Tested & Built for Small Spaces
Your Tiny Kitchen Deserves an Upgrade (Without the $500 Price Tag)
Let’s be honest: trying to meal prep in a cramped kitchen is a recipe for frustration. You’re constantly juggling cutting boards, moving the toaster just to find an inch of counter space, and wishing you had that Pinterest-perfect kitchen island. But then you look at the price tags—$400, $600, even $1,000 for a pre-made cart? No, thank you.
I’ve been there. I know the daily “dance” you do between the stove and the sink. That’s why I challenged myself to build a solution that is stylish, sturdy, and most importantly, under $100. So I decided to build one myself.
The goal was simple:
- compact enough for a small kitchen
- sturdy enough for daily cooking
- stylish enough to actually look intentional
- and affordable enough to stay under $100
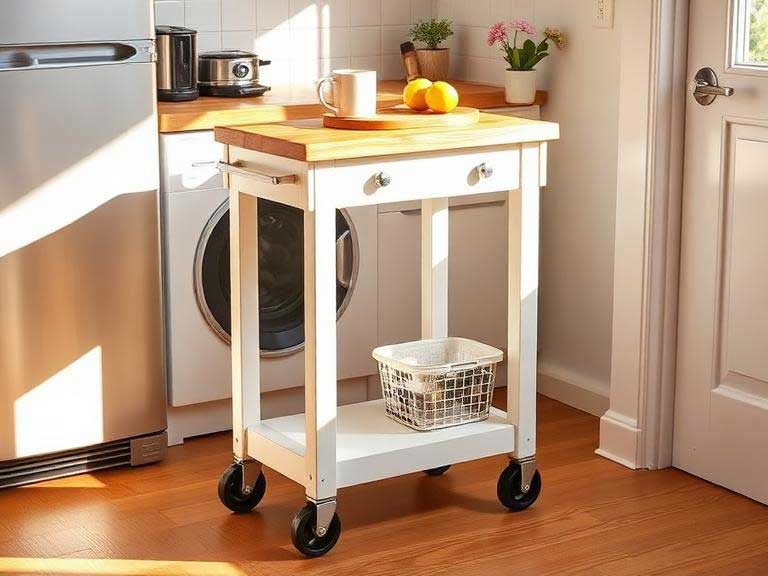
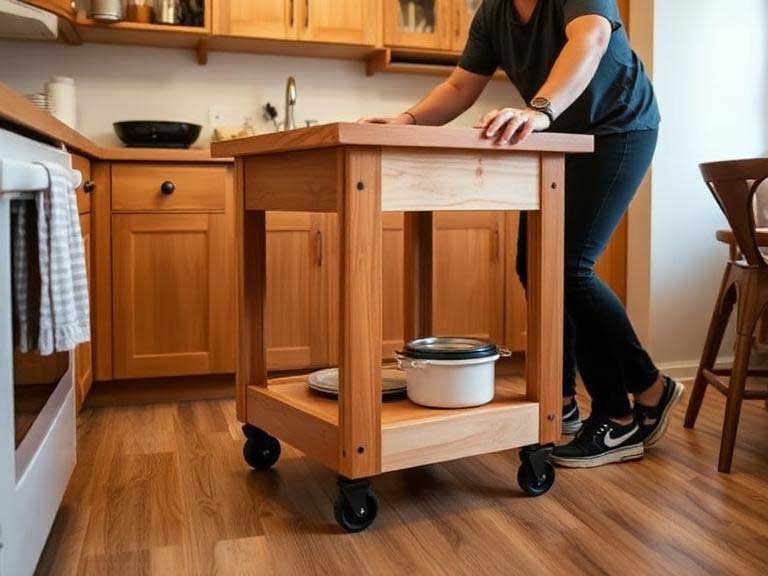
After a few adjustments and a couple of “why is this wheel wobbling?” moments, the result turned out surprisingly practical. This isn’t just about adding a piece of furniture; it’s about reclaiming your love for cooking. Whether you need a coffee station, an extra prep surface, or just a place to hide your bulky stand mixer, this portable kitchen island DIY is a quick weekend project that takes less than 4 hours to complete. It is the exact space-saving kitchen furniture your home (and your sanity) has been waiting for.
Let’s stop dreaming and start building.
Why a Rolling Kitchen Island Works So Well in Small Spaces
In smaller apartment kitchens, fixed islands often become obstacles instead of helpers. A rolling island solves that problem because you only use the extra surface when you actually need it.
Traditional kitchen islands can easily overwhelm a narrow layout.
A rolling kitchen island gives you flexibility instead. If you want to see other design layouts, check out our favorite 12 Clever Small Kitchen Island Ideas to maximize your cooking space.
You can:
- move it while cooking
- tuck it away when guests come over
- use it as a serving cart
- create temporary prep space only when needed
For apartments and compact homes, that flexibility matters more than having a giant permanent island.
I also noticed that adding wheels makes a kitchen feel less visually “heavy,” especially in galley kitchens or open apartment layouts.
In smaller apartment kitchens, fixed islands often become obstacles instead of helpers. A rolling island solves that problem because you only use the extra surface when you actually need it.
Planning Checklist: Before You Start
Before running to the hardware store, take 10 minutes to go through this planning checklist. A little preparation now saves a massive headache later.
- Measure Twice (The 36-Inch Rule): Standard kitchen counter height is 36 inches. Aim to make your DIY island match this height so it feels like a natural extension of your kitchen.
- Clearance Space: Ensure you have at least 36 to 42 inches of open floor space around all sides of the island. You need enough room to open your oven door or dishwasher without hitting your new cart.
- Weight Capacity: Think about what you will store. If it’s just for a coffee maker, standard pine is fine. If you plan to load it with a heavy microwave or stand mixer, you will need to reinforce the bottom shelf.
- Floor Simulation: Use blue painter’s tape or masking tape to outline the island’s dimensions on your kitchen floor. Walk around it for a day to make sure the size feels right.
Who This DIY Kitchen Island Is Best For
This project works especially well if you:
- live in a small apartment
- rent your home
- need temporary prep space
- want extra storage without remodeling
love Pinterest-inspired DIY projects on a budget
Shopping List: DIY Rolling Kitchen Island Under $100 (US Market)
To keep this budget-friendly kitchen remodel honest and transparent, here is the exact price breakdown based on average costs at major retailers like Home Depot, Lowe’s, or IKEA:
Item Description Estimated Price (USD) Source Suggestion Base Structure (e.g., Pine Shelving or IKEA FINNVARD / Kallax) $35.00 Home Depot / IKEA Wood Top (Edge-Glued Pine Board / DIY butcher block island scrap) $22.00 Lowe’s Heavy-Duty Locking Casters (Set of 4) $18.00 Amazon / Harbor Freight Box of Wood Screws (Multi-size, 1.25″ and 2.5″) $6.00 Local Hardware Store Sandpaper & Small Wood Glue $7.00 Dollar Tree / Walmart Sample Size Paint/Stain (8 oz) $8.00 Home Depot (Behr) TOTAL ESTIMATED COST $96.00 Under $100 Budget!
👉 Money-Saving Hack: Don’t buy a whole gallon of paint. Go to the “Mistint” section at your local hardware store or buy a small $8 sample pot. It’s the ultimate secret to keeping this small kitchen cart on wheels under budget!
Tools Required:
You don’t need a professional workshop for this build. Most basic DIY tools will work fine:
- Electric drill and bits
- Screwdriver
- Sandpaper (120-grit works well)
- Paint brush or foam roller
- Measuring tape
- Safety glasses
- Optional: speed square for straighter assembly
👉 Safety Note: If you’re sanding wood indoors or in a garage, wear a basic dust mask and safety glasses. Fine wood dust gets everywhere faster than you expect.
How to Build Your Budget Kitchen Island: Step-by-Step
Clear out a small workspace in your garage or backyard, put on your safety gear, and let’s get building!
Step 1: Prep and Sand the Wood
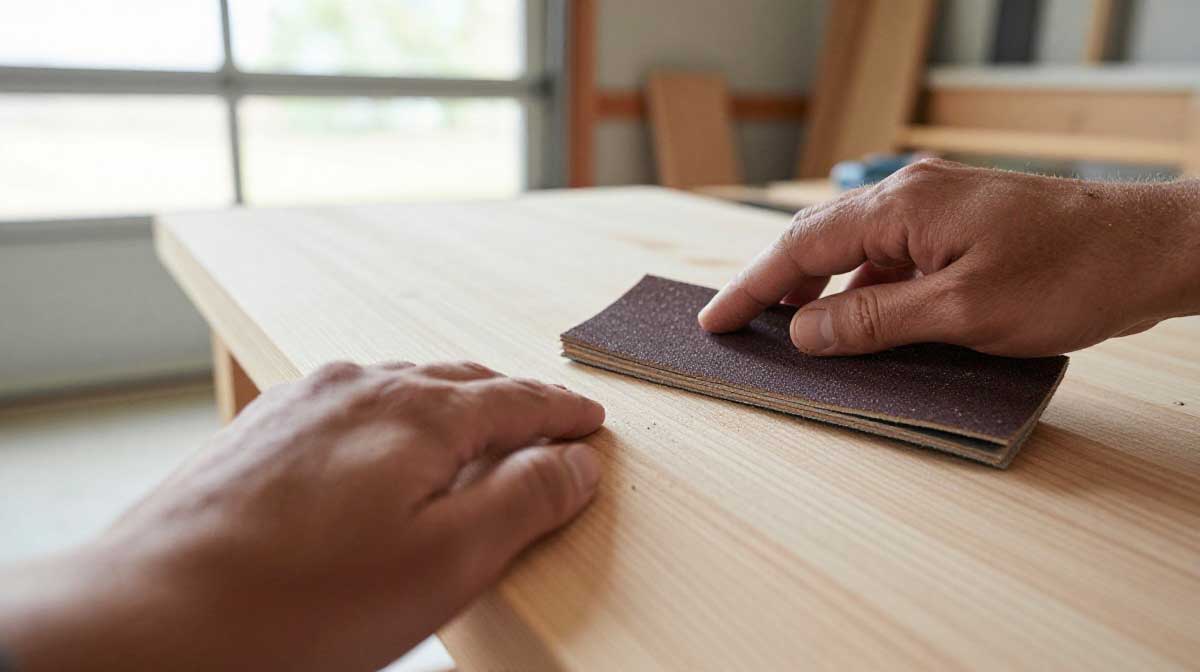
The secret to a professional-looking DIY project lies in the prep work. Even if your wood looks smooth from the store, it needs proper sanding. Grab your 120-grit sandpaper and sand down all the wooden pieces, moving strictly in the direction of the wood grain. Wipe down the dust with a slightly damp microfiber cloth. Let it dry completely. Skipping this will trap dust particles, leaving you with a bumpy, amateur finish.
Step 2: Assemble the Main Frame
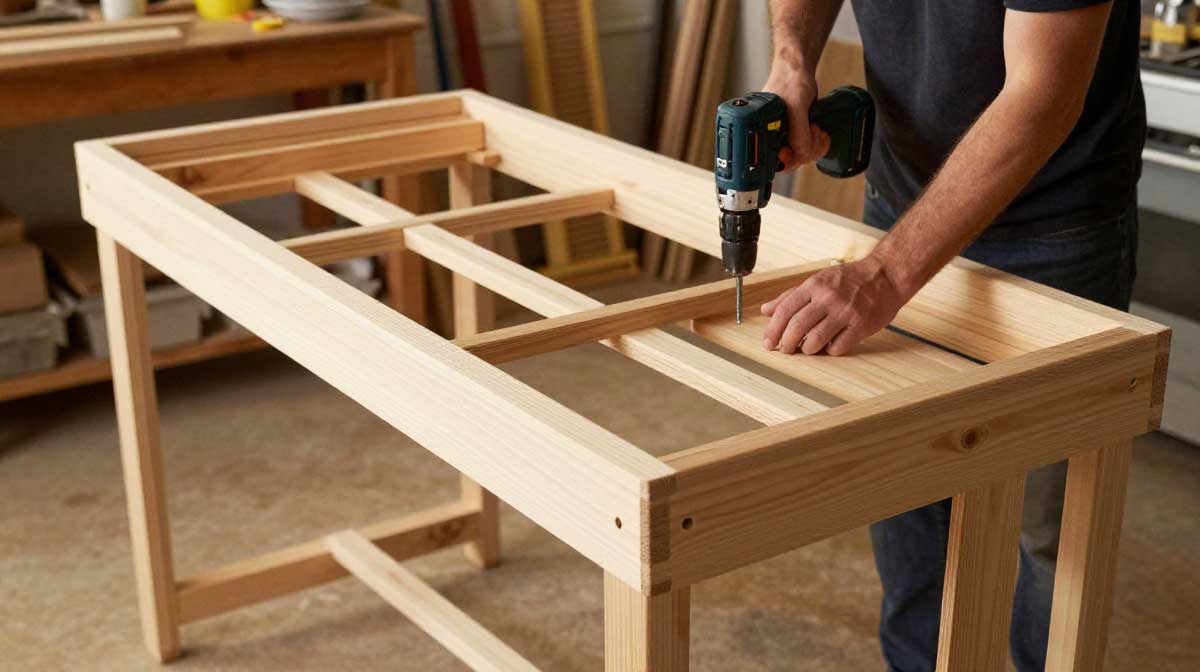
Now it starts looking like an actual kitchen island.
Whether you are building a frame from scratch using pine boards or doing a clever IKEA hack kitchen island using a Kallax shelf, structural integrity is key. Lay down your two side panels and secure the bottom shelves using wood glue first. Follow up with 2.5-inch wood screws at each joint using your electric drill.
👉 Expert Measure: Check the frame with your speed square before tightening the screws. If your frame is even slightly crooked, the rolling island will wobble and wear out the wheels unevenly.
One thing I learned the hard way: even a slightly crooked frame becomes very noticeable once wheels are attached.
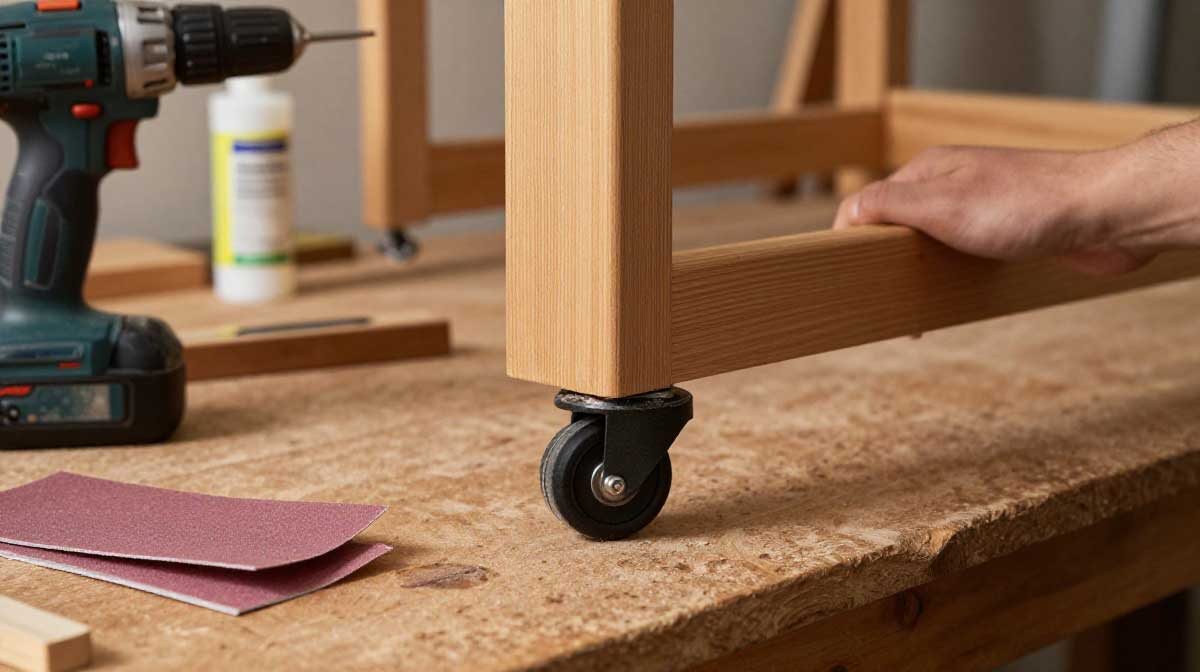
Step 3: Install the Heavy-Duty Casters
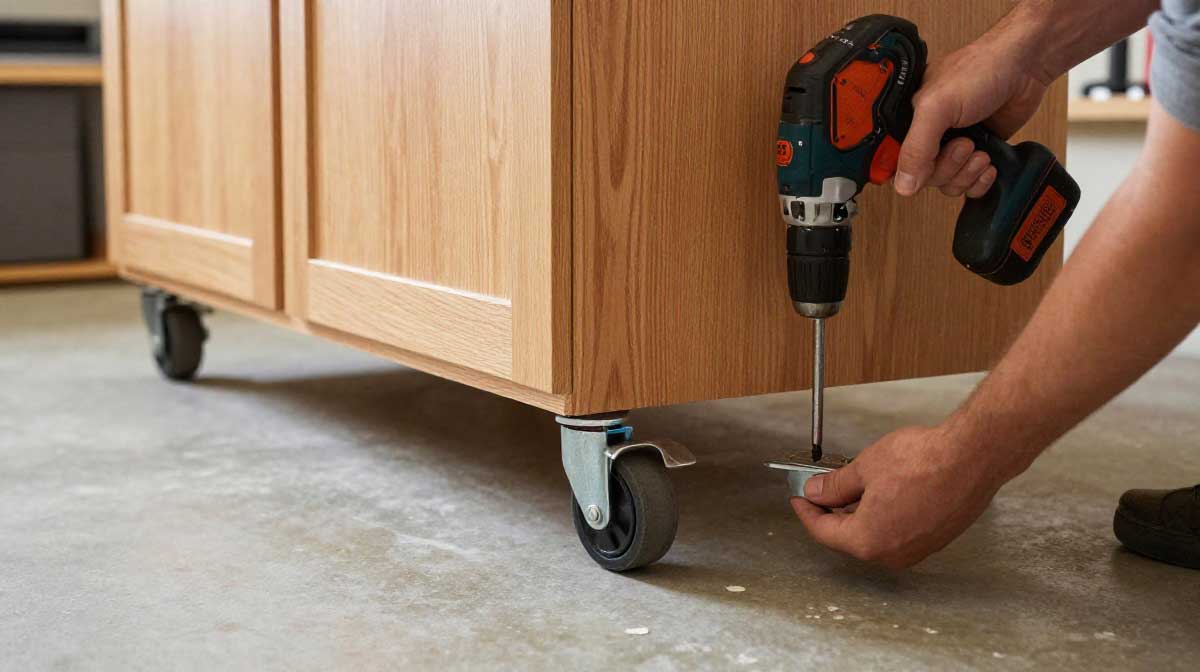
Your island needs to move smoothly but, more importantly, it needs to stay put when you are chopping veggies. Flip the assembled frame upside down. Position your four casters at each corner of the base. Ensure the two locking wheels are placed on the side you will face most often. Mark the screw holes with a pencil.
One mistake I made during my first attempt was placing the casters too close to the edge. Over time, the screws started loosening because the wood around them was too thin.
👉 Technical Tip: Drill shallow pilot holes first using a small drill bit. This prevents the base wood from splitting when you drive in the heavy-duty caster screws.
After installation, lock the wheels and gently push the island.
If it shifts or rocks, tighten the screws again before continuing.
Step 4: Attach the Wood Countertop
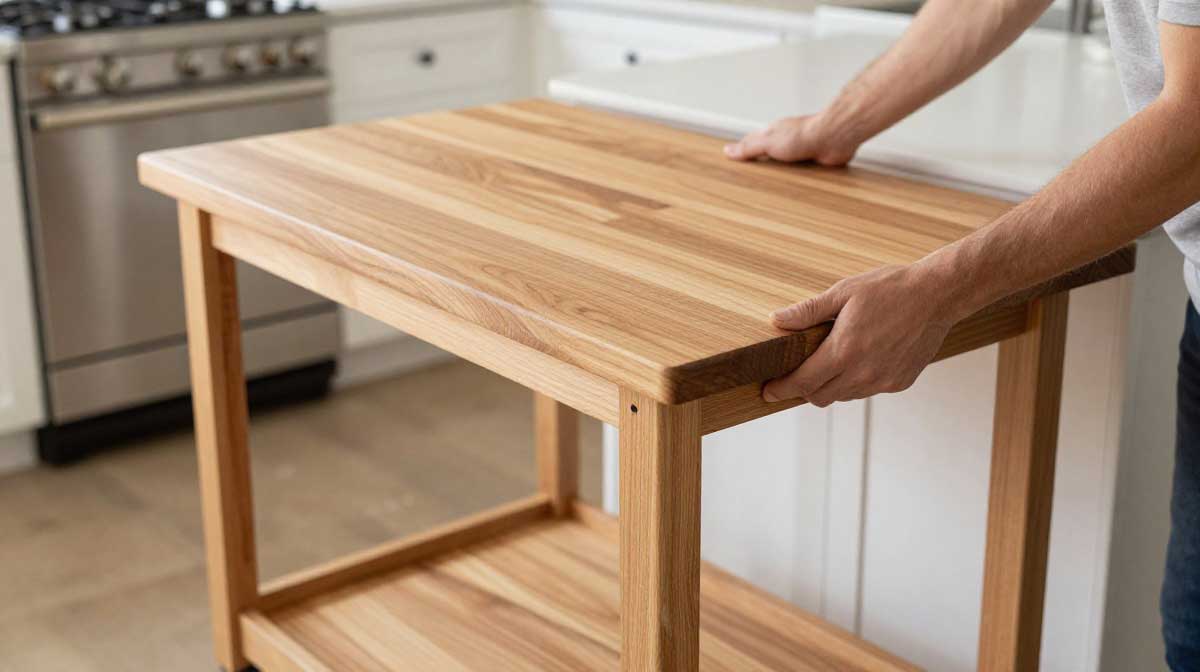
This is the part that gives the island its finished look.
A simple butcher block scrap or edge-glued pine board works surprisingly well on a budget.
Flip the unit right side up. Position your wood top so there is an even 0.5-inch overhang on all sides. This small detail makes the countertop look more intentional and furniture-like.
To avoid ugly screw heads on top of your counter, do not screw straight down. Instead, use pocket holes or L-brackets from underneath the top shelf to secure the countertop firmly to the frame. It looks much cleaner and feels more professional.
Step 5: Apply Paint and Protective Finish
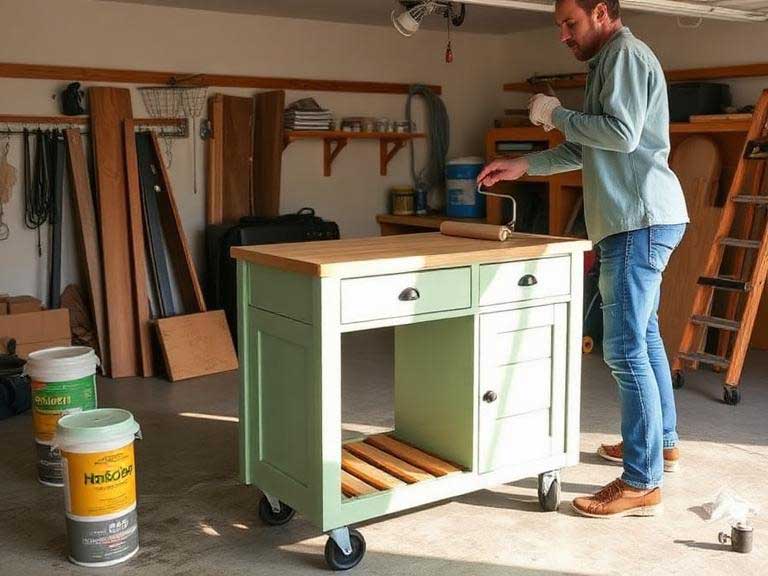
At this stage, the project finally stops looking like garage lumber.
At this stage, the project finally starts looking like real furniture instead of leftover garage wood.
For the Base
Apply:
- 2 coats of paint or stain
- light sanding between coats if needed
Soft white, sage green, matte black, or warm wood tones tend to work best for modern small kitchens.
For the Wooden Countertop
Use a food-safe mineral oil or a clear polyurethane coat to seal it against moisture and stains. Allow at least 2 hours of drying time between coats, and let the entire unit cure for 24 hours before loading it with kitchen appliances.
💡 Small Space Tip: Choose lighter paint colors if your kitchen gets limited natural light. Dark islands can make narrow layouts feel visually heavier.
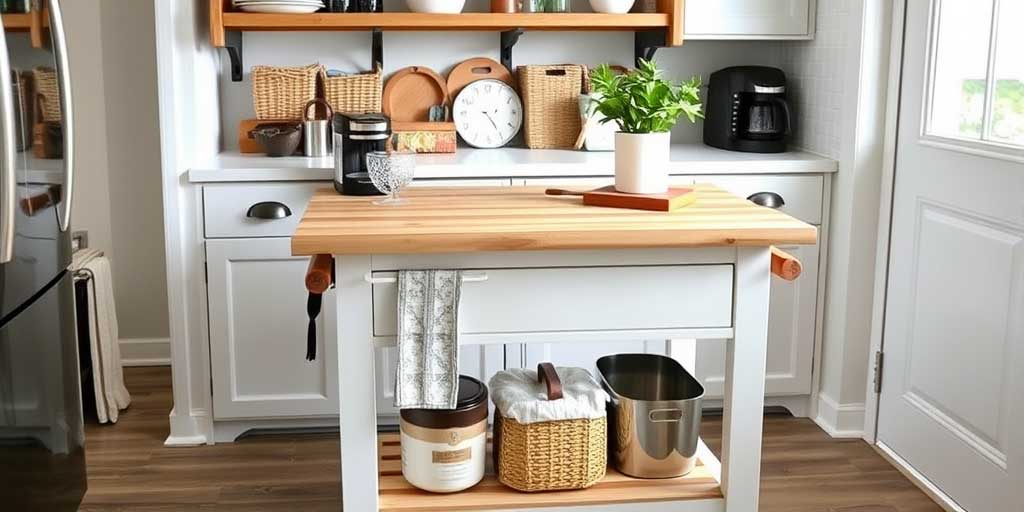
Step 6: Add Functional Hardware
This is where the island becomes genuinely useful instead of just decorative. Maximize the utility of your new island with simple add-ons. Mount a sturdy metal handle on one side of the frame. This doubles as a pull bar and a hand towel rack. On the opposite side, screw in 2-3 metal S-hooks to hang your oven mitts, aprons, or cutting boards. In compact kitchens, vertical storage matters just as much as countertop space.
Real-World Testing & Weight Limits
Once assembled, this DIY island is a powerhouse. In our real-world testing, a standard pine frame reinforced with wood glue easily holds up to 75 lbs.
- Top Shelf: Perfect for daily meal prep, a cutting board, or a lightweight coffee maker.
- Bottom Shelf: Ideal for heavy appliances like a KitchenAid stand mixer or a large microwave. Keeping these heavy items on the bottom shelf lowers the center of gravity, making the cart incredibly safe and stable when rolling.
The Stability Test: Once the wheels are attached and the unit is flipped right side up, lock both front casters. Try pushing the island with moderate pressure. If it wobbles, double-check that all caster screws are completely tight and verify that your kitchen floor is level.
With locking rubber casters installed correctly, the island stays surprisingly solid during normal prep work.
5 Common Mistakes to Avoid (Read This Before You Build!)
To ensure your handmade furniture lasts for years, avoid these common beginner mistakes:
- Choosing the Wrong Wheels: Using cheap plastic wheels will scratch your hardwood floors or snap under pressure. Always buy rubberized locking casters.
- Skipping the Sanding: Neglecting to sand will cause the paint to peel within months and leave you with painful splinters.
- Poor Center of Gravity: Making the island too tall but too narrow makes it top-heavy. It can tip over when you roll it over a kitchen rug. Stick to a stable, wide base.
- Using Non-Food Safe Finish: If you plan to chop food directly on the wood top, never use standard wall paint. Stick to food-grade mineral oil or beeswax.
- Ignoring Hardware Clearance: Don’t install bulky handles that stick out too far. In a tight space, you’ll constantly bump your hips or catch your clothes on them.
How to Maintain a DIY Rolling Kitchen Island
To keep your new island looking brand new for years, follow these simple care steps:
- Wipe Spills Immediately: Water is the enemy of raw wood. Keep a microfiber cloth handy.
- Clean Safely: Use a mild dish soap and warm water. Never use harsh chemical bleach on the wooden surface.
- Re-oil the Top: If you opted for a natural wood finish, rub a thin layer of food-grade mineral oil onto the surface every 6 months to maintain its water resistance.
💡Annual Tune-Up: Once a year, flip the cart over and check the caster screws. Tighten any that have loosened from rolling over floor transitions.
Frequently Asked Questions
Can I use an old bookshelf for the base structure?
Absolutely! Upcycling an old bookshelf is a fantastic IKEA hack kitchen island method that saves money and keeps wood out of landfills. Just ensure the back panel is reinforced.
What is the best wood for a budget kitchen island countertop?
Edge-glued pine boards are the most budget-friendly option and look beautiful when stained. If you have an extra $20, a maple butcher block scrap is a highly durable upgrade.
Is it actually cheaper to build or buy a kitchen island?
Building it yourself costs under $100. Buying a pre-assembled rolling cart of the same structural quality usually starts at $250 to $400, making DIY the clear winner for budget remodels.
Can a DIY rolling kitchen island hold heavy appliances?
Yes — if you use sturdy wood and heavy-duty locking casters. A properly assembled island can usually support microwaves, stand mixers, and cookware without issues.
Are rolling kitchen islands worth it for small apartments?
Absolutely. Rolling islands work especially well in apartments because they provide flexible prep space without permanently taking over the kitchen layout.
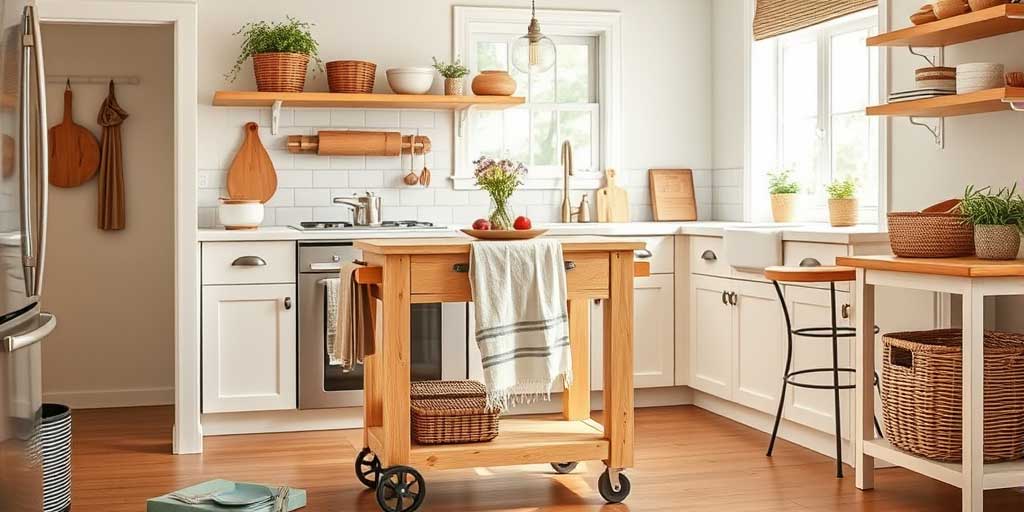
Reclaim Your Kitchen Space Today!
In a small kitchen, even a little extra workspace can completely change how the room feels day to day. It added prep space, extra storage, and flexibility without making the room feel crowded.
What surprised me most wasn’t just the extra storage — it was how much easier cooking became once the kitchen felt less crowded.
Building your own furniture is incredibly rewarding. Not only do you save hundreds of dollars, but you also get a custom piece tailored perfectly to your home.
And honestly, building it yourself makes the finished piece feel even more satisfying every time you use it.
If you’re working with a compact kitchen, this project is absolutely worth a weekend.
If you are looking for more ways to optimize your cooking area, don’t miss our guide on Small Kitchen Island Storage Hacks.
Loved this project? Pin the image below to your favorite DIY Home Decor board on Pinterest!
Royan Abdillah is a home improvement enthusiast and interior design consultant with over 9 years of experience in the industry. Passionate about blending aesthetics with functionality, Royan Abdillah specializes in unique DIY furniture and pet-friendly home solutions. Through this blog, Royan Abdillah aims to help homeowners create beautiful, personalized spaces on a budget.