Does your home lack natural character? Consider installing a ceiling to add a warm touch to the house’s look. Easy upgrades are a quick way to add style to your home. Pine tongue-and-groove panels offer a beautiful natural wood ceiling. If you want to apply pine wood ceilings, here is the explanation for you!
See also: Get To Know 6 Ceiling Materials Ideas for The Best Home Appeal
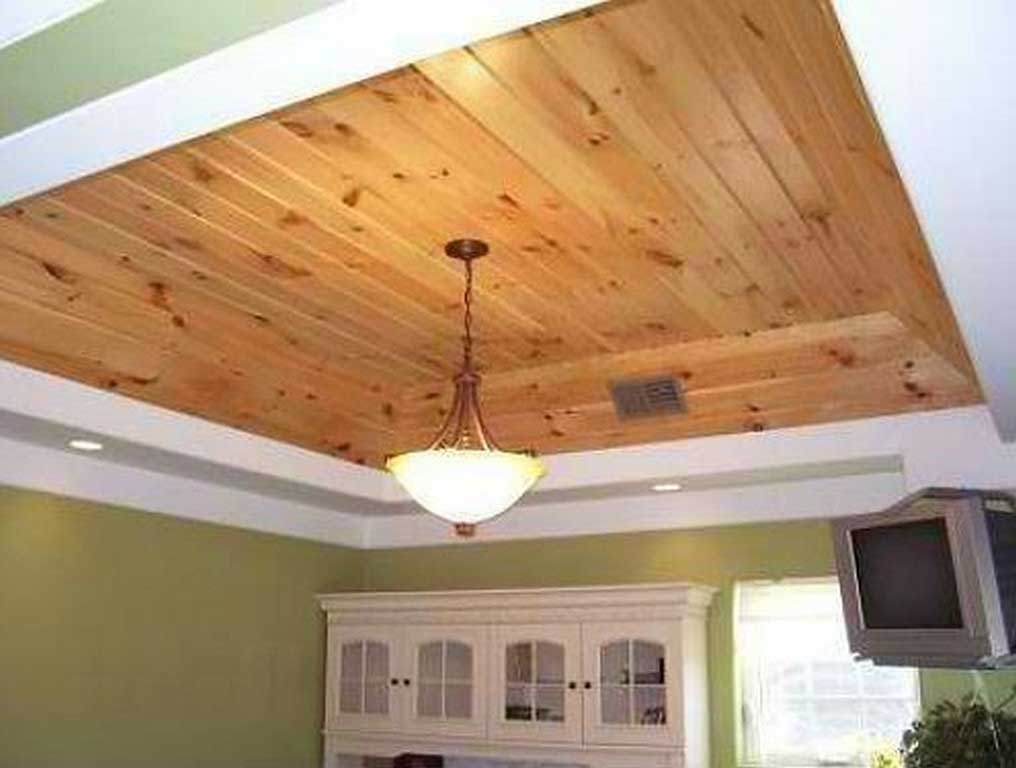
Pine Wood Panels
The pine ceiling has a long enough shape to cover the entire width of the room without using additional materials. Installing a paneled ceiling can be done by one person, but the parts are much easier with the help of two people. The basic process involves detailed cutting of each ceiling joist.
The advantage of using this material is that the board is light and thin, making it easier for you to lift it to the roof quickly. You also don’t need help from other people because you can hold it until it is fully installed. Additionally, pine wood ceilings have a lovely rustic look to most mansions, vacation homes, and cabins.
How to Install Pine Board

To begin with, the frame in the house must be sturdy and robust at the same time. The beam does not have to be 24” in the center in a vertical pattern. Also, make sure that no roof leaks last a long time. For pattern layouts, you can apply perpendicular to the framing to change the board’s direction. In addition, it is essential to keep each row straight for the short roof look to look deeper.
Next, start measuring your room’s overall length and width with the materials you have. After that, determine the width of the first and last rows to have an entire previous row. Continue sealing the planks on the saws and letting the dry glue overnight before installing pine wood ceilings. While it may seem more straightforward, keep in mind that installation requires unique details.
To prepare the ceiling, remove the trim and ensure the electrical installation is secure. To confirm, you can contact a licensed electrician. Use the stud finder to locate the joists if the roof framing is closed. Mark the beam’s location with a clear line to make it easier to install later. You also need to think about the gaps and trim used.
Next, trim the first row and check each section for proper installation. If you buy accidental pine planks, be sure to place them randomly so they can expand into the ceiling. Don’t forget to secure each board with nails measuring 2” 15 from the edge to prevent wood splitting.
To place each row in a row of pine wood ceilings, you can cut the grooved blocks, so they don’t damage the wood. Next, ensure to balance the joints by forming the lumber at least 12” of the preceding line. Also, make sure the next row of seats is tight using assistive devices such as hammers and grooved push blocks. Keep running successive rows to produce a consistent array.
Overall, you can choose a ceiling made of pine wood to be applied at home. The strong material can provide functional and aesthetic benefits. It will be very suitable to be involved in all types of homes because it looks warm and beautiful at the same time. Best of all, pine wood panels also have easy installation.
See also: All You Need to Know About Ceiling Materials for House
Royan Abdillah is a home improvement enthusiast and interior design consultant with over 9 years of experience in the industry. Passionate about blending aesthetics with functionality, Royan Abdillah specializes in unique DIY furniture and pet-friendly home solutions. Through this blog, Royan Abdillah aims to help homeowners create beautiful, personalized spaces on a budget.