When redecorating the house, some things need professional help so there is no error. However, there is nothing wrong with trying to do it yourself. Besides reducing the cost of hiring a professional, the sense of accomplishment feels more pleasant. One of them is installing curtain tracks by yourself! Read more to know the steps!
Installing Curtain Tracks On Ceiling You Should Consider
Things that Needed for Installing Curtain Tracks
The first tool to fit tracks is a tape measure. A tape measure uses to measure tracks to fit the window. When measuring, a pencil uses to ascertain its final size. Use an electric drill to attach screws to the wall. Do not forget about screwdrivers to tighten screws. Do not forget about these tools before installing the tracks.
You need to measure the track to fit the size of the window. You can measure to place the curtain across the front of the window or inside the window opening. This measurement is needed so that when installing curtain tracks, the size does not look off. This can reduce the beauty of the interior of your home. Make sure it’s symmetrical for balance.
The Easy Steps to Installing Curtain Track
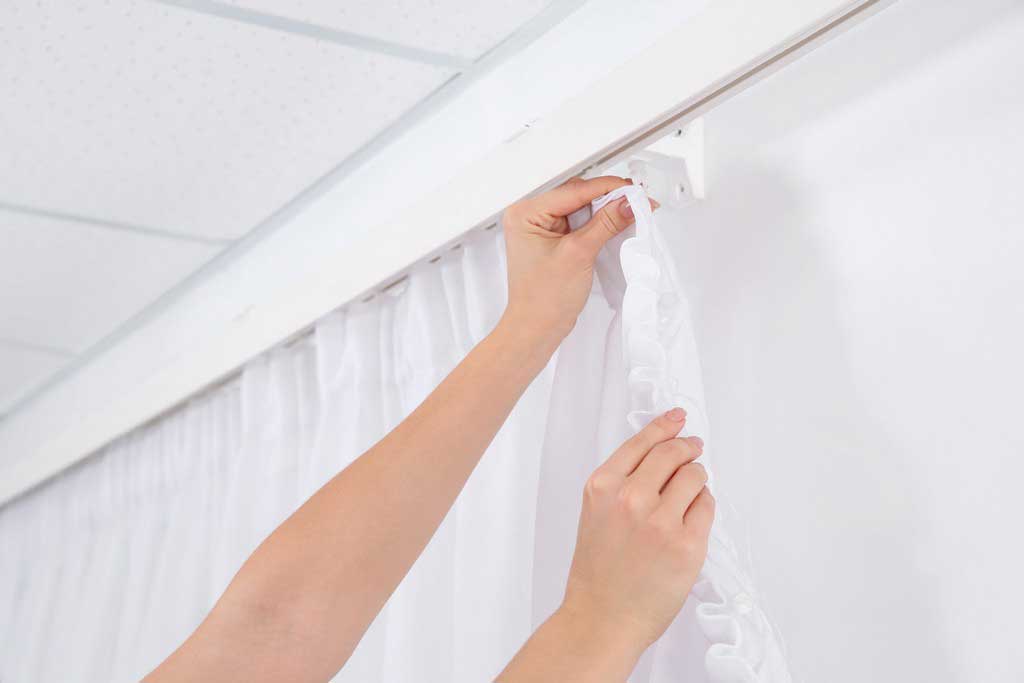
Once you’ve found the position, use a pencil to mark the bracket hole that matches. Drill the mark and insert the rawl plugs. If your ceiling is uneven or sloping, use a bradawl or temporarily hammer a long nail loosely to mark the position. That way you can double-check to ensure a good position for the curtain track.
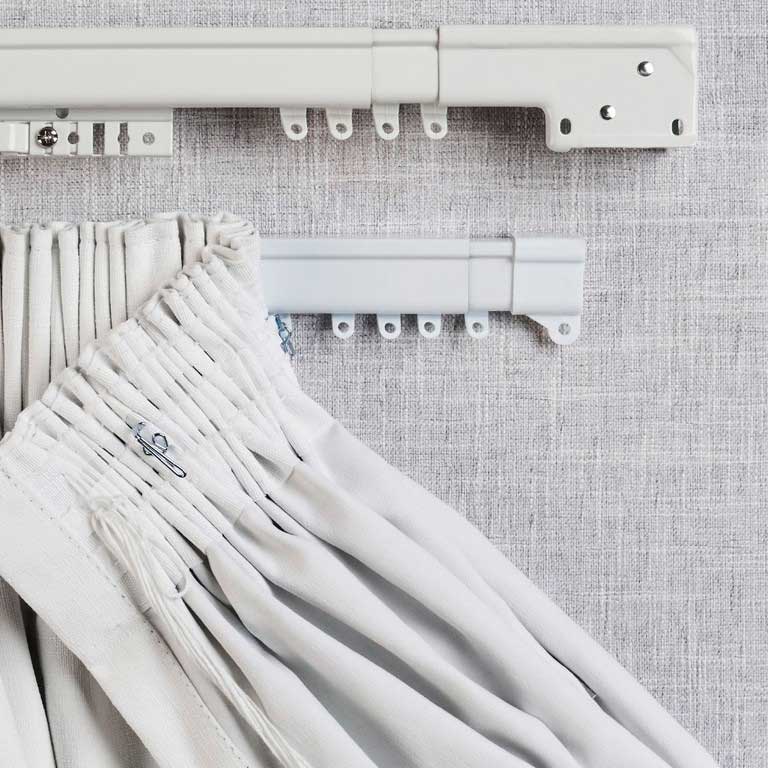
If you need to cut the track to fit the window, use a sharp saw for good results. Give an additional 10 cm on one-half of the track to provide an overlap. Meanwhile, if you use a plastic track, be careful when used over a curved surface because it may be bent to fit angles. When installing curtain tracks, tracks made of metal are recommended due to their durability.
Bends on the tracks should not be in raisers less than 22 cm. This is to ensure the smooth operation of the glider so that the curtain does not snag when used. When confirming the track position, make sure the position of the end mounting brackets are marked first and the distance between the brackets is the same. The ideal space is 36.5 cm between each bracket.
Once each bracket is attached, glide the tracks carefully so that the tracks are properly attached. Ensure the brackets are securely attached so the track will not fall easily when the curtain hangs. Tighten the remaining screws when the installing curtain tracks are done. Put the end caps to prevent the curtain from leaving the track when it has been hung.
With the steps above, you can install your curtain tracks at home. Now there is no need to hire a professional because, with easy steps, you can do it yourself. For first-timers, ask someone for help to assist you. Also, if you have no experience with drills, enlist the help of someone who understands how to use the drill to avoid unwanted flaws.
Royan Abdillah is a home improvement enthusiast and interior design consultant with over 9 years of experience in the industry. Passionate about blending aesthetics with functionality, Royan Abdillah specializes in unique DIY furniture and pet-friendly home solutions. Through this blog, Royan Abdillah aims to help homeowners create beautiful, personalized spaces on a budget.